All according to Necromundas lore and general aesthetic, I wanted my Zone Mortalis tiles to look grimy and industrial without spending forever on each piece. I kept the process simple, fast, and repeatable across multiple tiles. This guide shows exactly how I painted mine — feel free to tweak colours to your own hive’s flavour.
Colours & Materials Used
Priming
- Citadel Administratum Grey (spray)
- Citadel Grey Seer (light zenithal/directional pass)
Paints
- AK Burnt Umber (for base rim)
- Vallejo Metal Color – Dark Aluminum
- Citadel Gehenna’s Gold
- Pro Acryl Titanium White
- AK Dirty Yellow
- Citadel Chaos Black
Oil Wash
- Burnt Umber oil paint
- Ochre Yellow oil paint
- Lamp Black oil paint
- Odourless White Spirits
Ratio: 45% Burnt Umber / 45% Ochre Yellow / 10% Lamp Black
Weathering
- Dark brown acrylic (for sponge chipping)
- Dirty Down Rust
Other
- A makeup sponge to wipe off the oil wash
- AK Ultra Matt varnish (optional)
Step-by-Step Guide
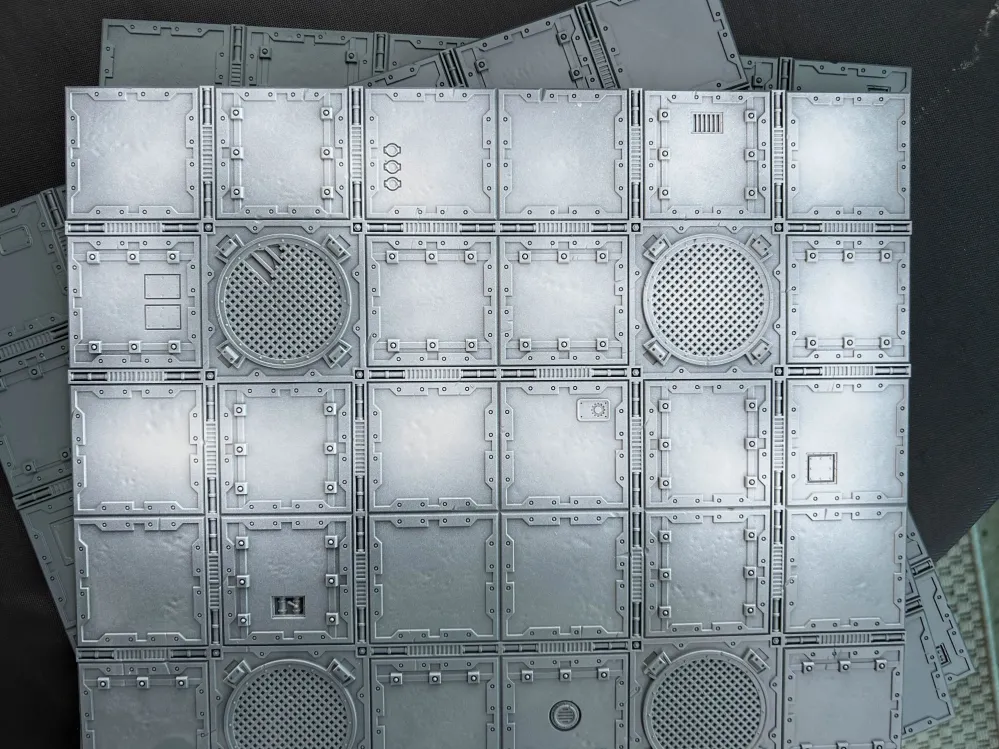
1. Priming the Tiles
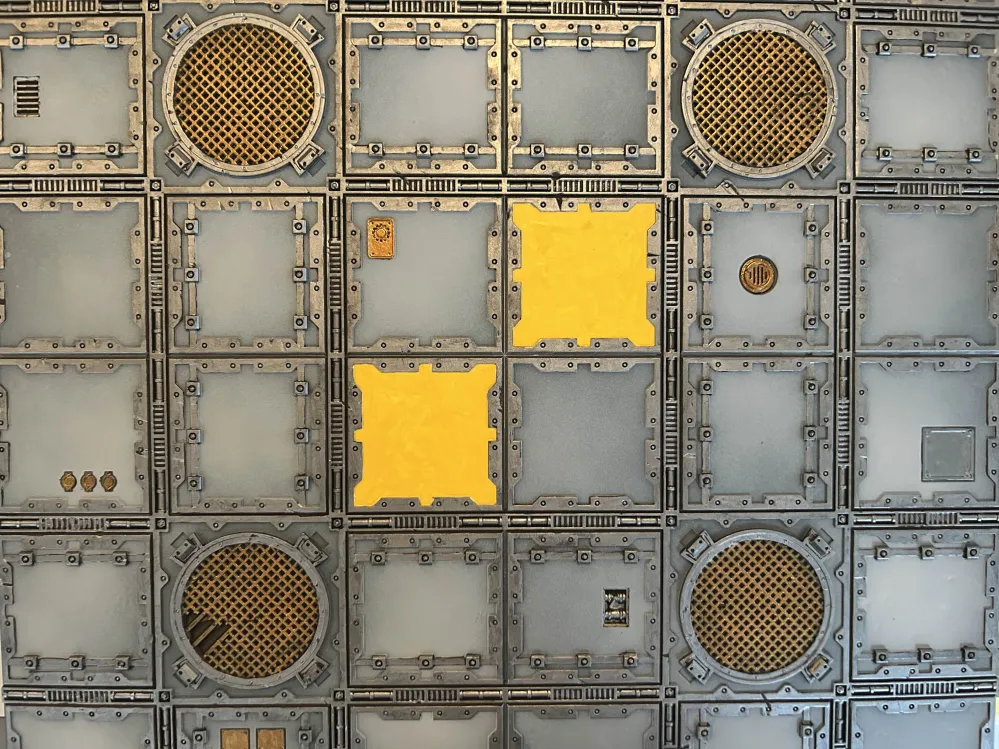
I started by priming the tiles with Administratum Grey, making sure everything got a nice base coat.
After that cured, I hit each square with a light spray of Grey Seer from above. This gives a nice highlight and shade.
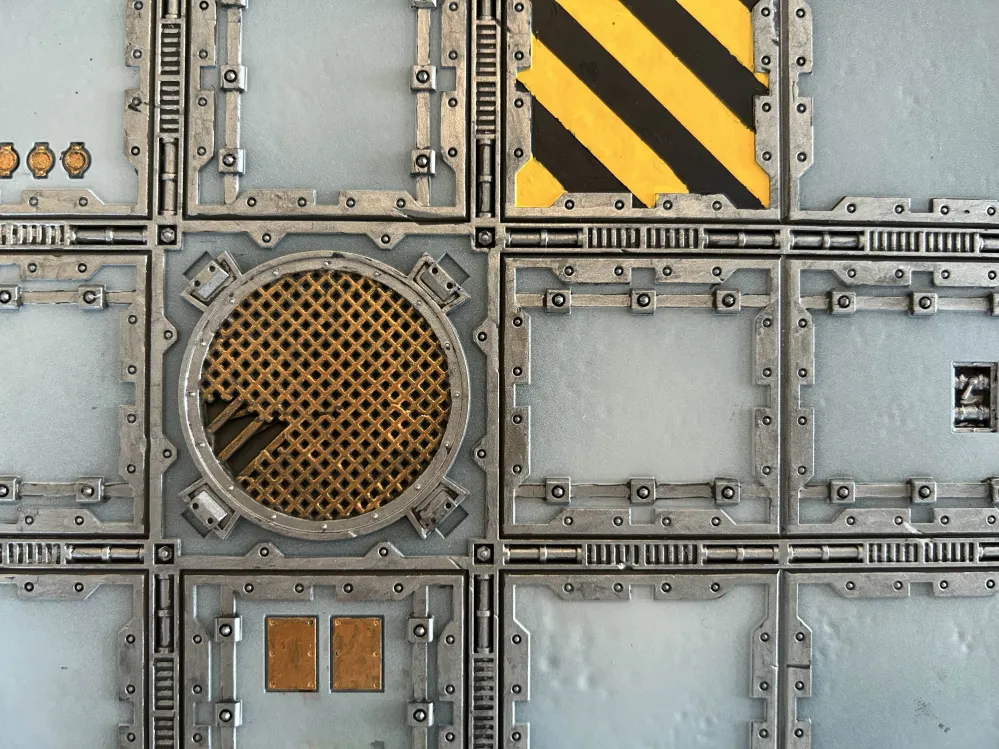
2. Painting the Base Rims & Metal
I painted all the rims and edges using AK Burnt Umber. This gives a warm base tone under the metal gold details.
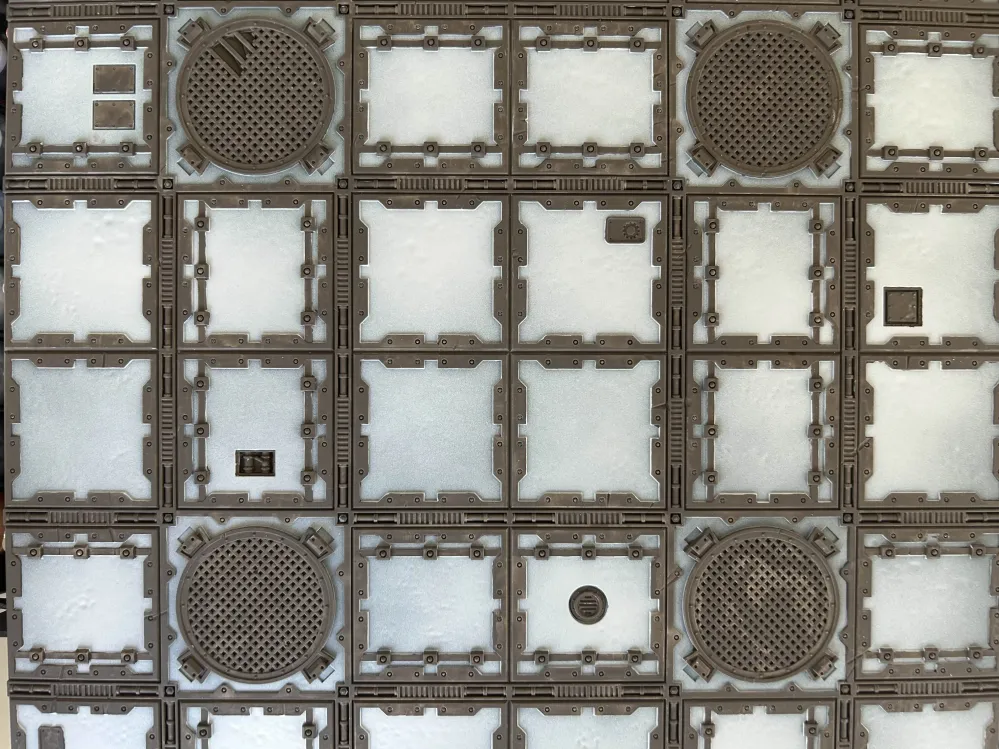
Once dry, I applied Vallejo Metal Color Dark Aluminum over the metal areas. This paint flows beautifully and gives a smooth darker metallic sheen with minimal effort.
A few accent details and the air vents (?) were picked out with Gehenna’s Gold to break up the monochrome metal and add interest.
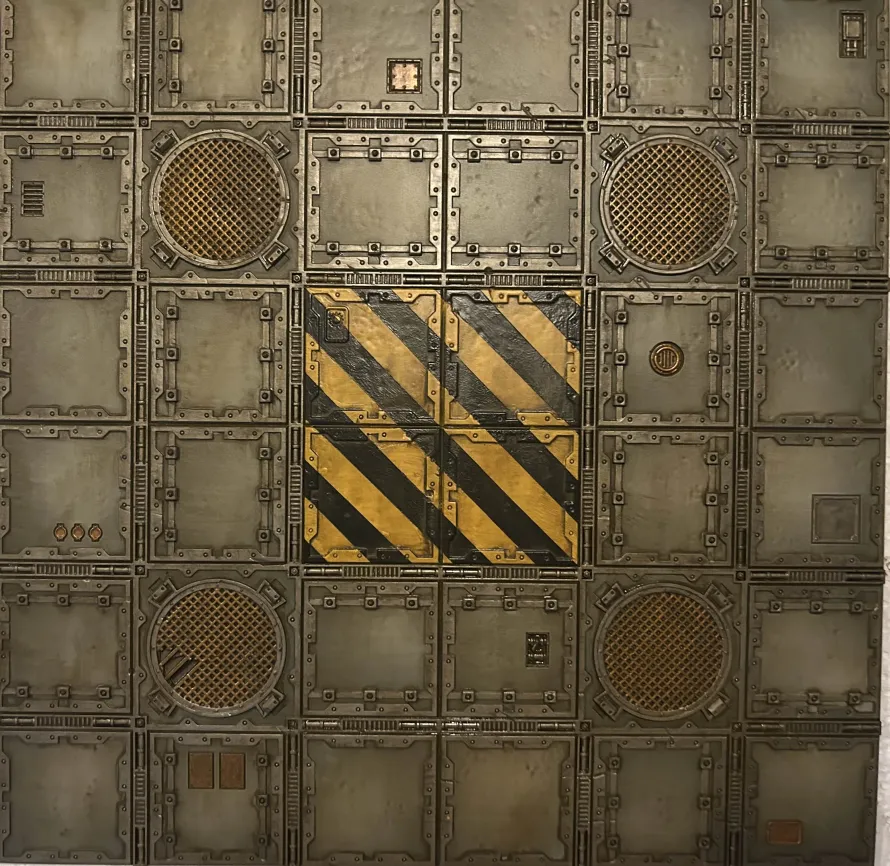
3. Hazard Stripes
This was the most eye-catching part of the tiles.
- I first painted the stripe areas with Pro Acryl Titanium White to give a bright base.
- Over that, I applied AK Interactive Dirty Yellow.
- After it fully dried, I masked off the yellow portions using tape.
- I then painted the exposed areas with Chaos Black.
Pull the tape and you get crisp hazard stripes.
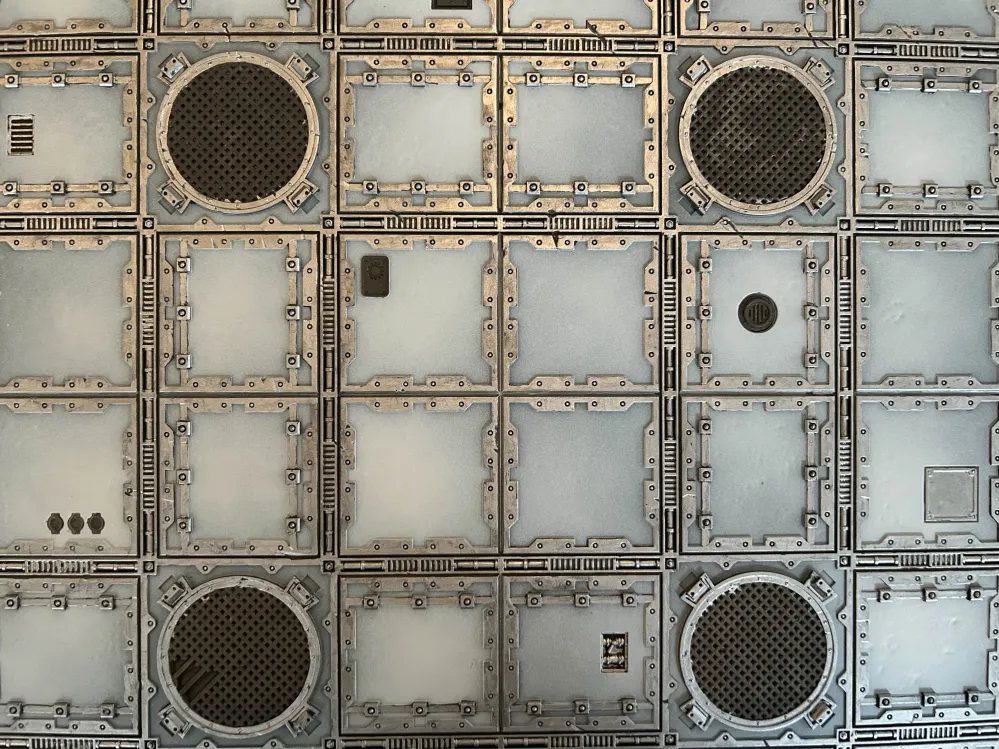
4. Oil Wash Time
For the main grime pass, I mixed an oil wash using:
- 45% Burnt Umber
- 45% Ochre Yellow
- 10% Lamp Black
- Thinned with white spirits until it was a heavy wash consistency.
Brush this generously over the entire tile — don’t be shy, the oils do the heavy lifting.
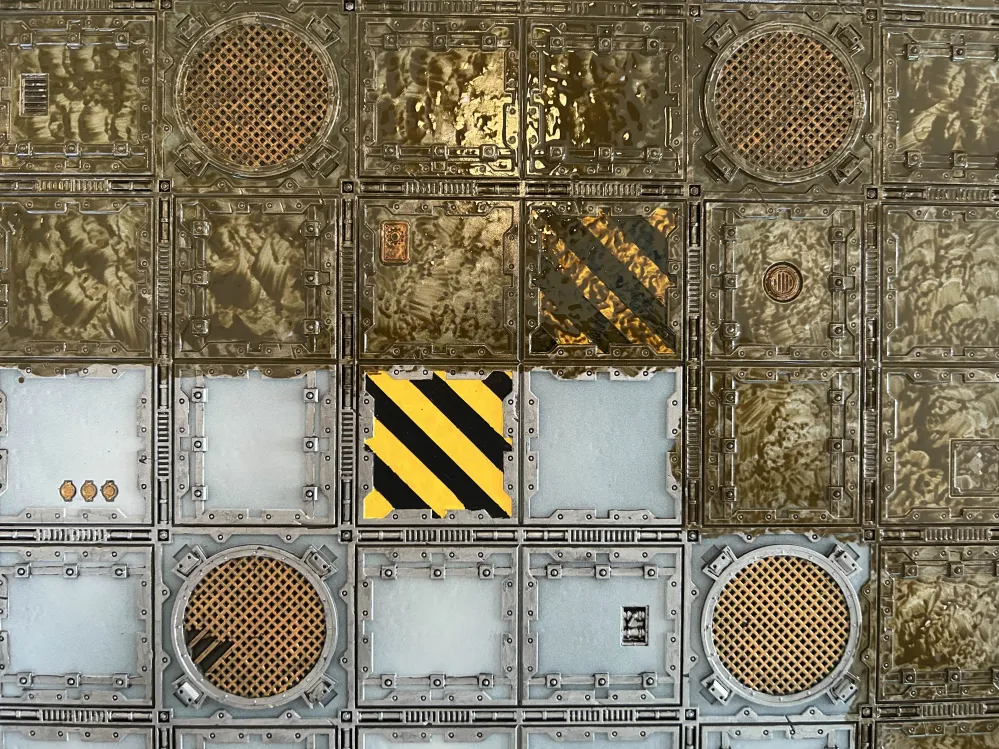
5. Wiping the Wash
After about one hour of drying (depending on temperature/humidity), it’s ready to manipulate.
Using a makeup sponge with some white spirit:
- First wipe in downwards strokes, removing most of the oil but leaving vertical streaks on the walls and surfaces.
- Once it has dried a bit more, maybe 15-30 minutes, wipe gently in horizontal strokes (left to right).
This removes harsh marks but keeps an even oily grime across flat surfaces, basically an oil filter.
This step gives that classic “industrial sump-factory” look — dirty but controlled.
Let the oils dry for 1–2 days before proceeding. Note that the image below is in bad lighting, the final result will be a bit brighter.
6. Weathering
To finish the tiles:
- I used a small torn sponge to dab on dark brown paint, building up random chips and worn edges.
- After that, I applied Dirty Down Rust sparingly to metal plates, bolts, and damaged sections for a corroded hive feel.
Let everything dry, and give the tiles a spray of AK Ultra Matt, then the tiles are table-ready.